Puppet making ideas
1. Fun on a Stick
you will need:
thin card
pencil
sticky tape
scissors
ruler
lollipop stick
felt tipped pens
cardboard template (optional)

Making puppets on lolly (Popsicle) sticks is so easy. I've made fishes but there are endless possibilities.
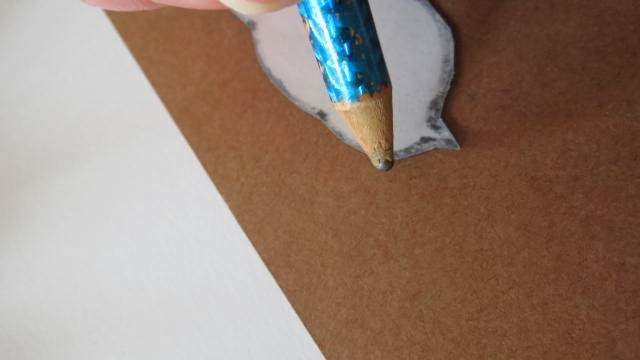
 Draw a fish shape on card. I used a cardboard template to achieve an outline of a fish. Cut out and then colour a design on one side. Tape a drinking straw or a wooden lollipop stick to the back and this becomes the handle.
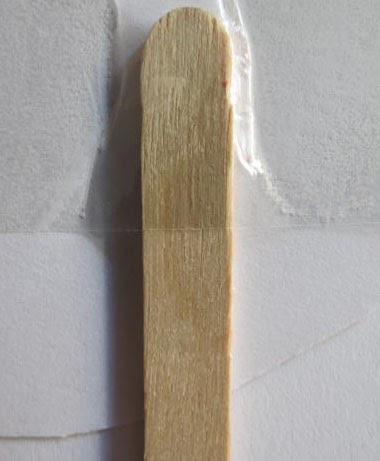


If you find it hard to free draw a fish shape, drawing around an outstretched hand does the job well.


Alternatively, any child’s drawing can be coloured in, cut out, and mounted in the same way.
2. Paper Finger Puppet

you will need:
construction paper or thin card
pencil
scissors
sticky tape and/or staple gun
feathers and/or other collage materials
Draw the shape of your creature onto thin card or construction quality paper i.e. teddy bears, elephants, birds etc. (no bigger than 8cm long and 5cm wide.) Again, I used a small template; a bird this time. Cut out following the penciled outline.
Also, measure and cut out a thin, rectangular band/strip from the same card or paper used for the creature. This should be long enough to wind loosely around an index finger.

Glue or tape up ends of strip together to make a circle, attach your creature to the middle/front edge of the circle with sticky tape or a staple.

Decorate with paper, feathers or other collage materials.
Best not to wear your finger puppet like a ring on the ring finger, better to slide over the tip of the index finger and have the band facing you and the puppet away from you for maximum performance potential.


3. Puppets made from Wooden Kitchen Spoons
Paint a wooden spoon with a skin colour. Allow to dry.
Glue wool strands or cotton wool on the spoon for hair (paint cotton wool if preferred), and, if using wool strands, it is easier to glue wool around the edge of spoon and across top; then add another layer from front to back.
Paint a face onto spoon. Either the concave or convex surface is suitable, or cut out features from gummed shapes etc.
Wrap fabric around the handle and secure with glue.
 |
| 'Let's Face It '- Summer Workshops 2009 - St Martin in the Bull Ring, Birmingham |
 |
| 'Let's Face It '- Summer Workshops 2009 St Martin in the Bull Ring, Birmingham |
 |
| 'Let's Face It' Summer Workshops 2009 St Martin in the Bull Ring, Birmingham |
....more puppet making ideas:
4. Paper plate Animal puppets/masks
you will need:
two paper plates
wax crayons
poster paints and brush
scissors
PVA glue
4. Paper plate Animal puppets/masks
you will need:
two paper plates
wax crayons
poster paints and brush
scissors
PVA glue
Think about the creature that you wish to make and using two paper plates draw on the defining facial features in wax crayon. Why do I need two paper plates? I hear you ask. Well, draw and colour the top half of the animal (or bird)– i.e. the ears, the eyes, include fur in and around the ears and eyes, or feathers/skin whichever applies on the first paper plate - Note: use a whole semi circle of paper plate space to illustrate these things. This plate will be cut up into the separate pieces eventually. Then draw and colour the nose (or snout) and the mouth,(or beak) on the other plate (use the lower section of the second plate) this plate will remain intact. Wash over both paper plates completely, thinly, with paint. The wax resist technique is quite effective. Allow to dry.The next stage is to make one puppet/mask from the two plates. You need to make up a construction, so cut away the eyes and ears in a kind of half face section from the first plate. You can cut off the ears, and have each ear as a separate thing if you wish. You can re-position the ears when you construct the model face to obtain a further 3D effect. Now, using the PVA glue carefully adhere all that you have cut away from plate (one) on to the nose and mouth section of plate (two) so there is a two layered look, and then add the ears to make up three layers.
5. Laminated Puppets
Cut out a character(s) from magazines/old calendars etc. You can even laminate to firm them up. Again, stick onto wooden lollipop sticks as a handle.


0 Comments
POST your comment here: